To install WordPress in your hosting account with the help of Softaculous, follow the steps given below:
Step 1: Login to cPanel
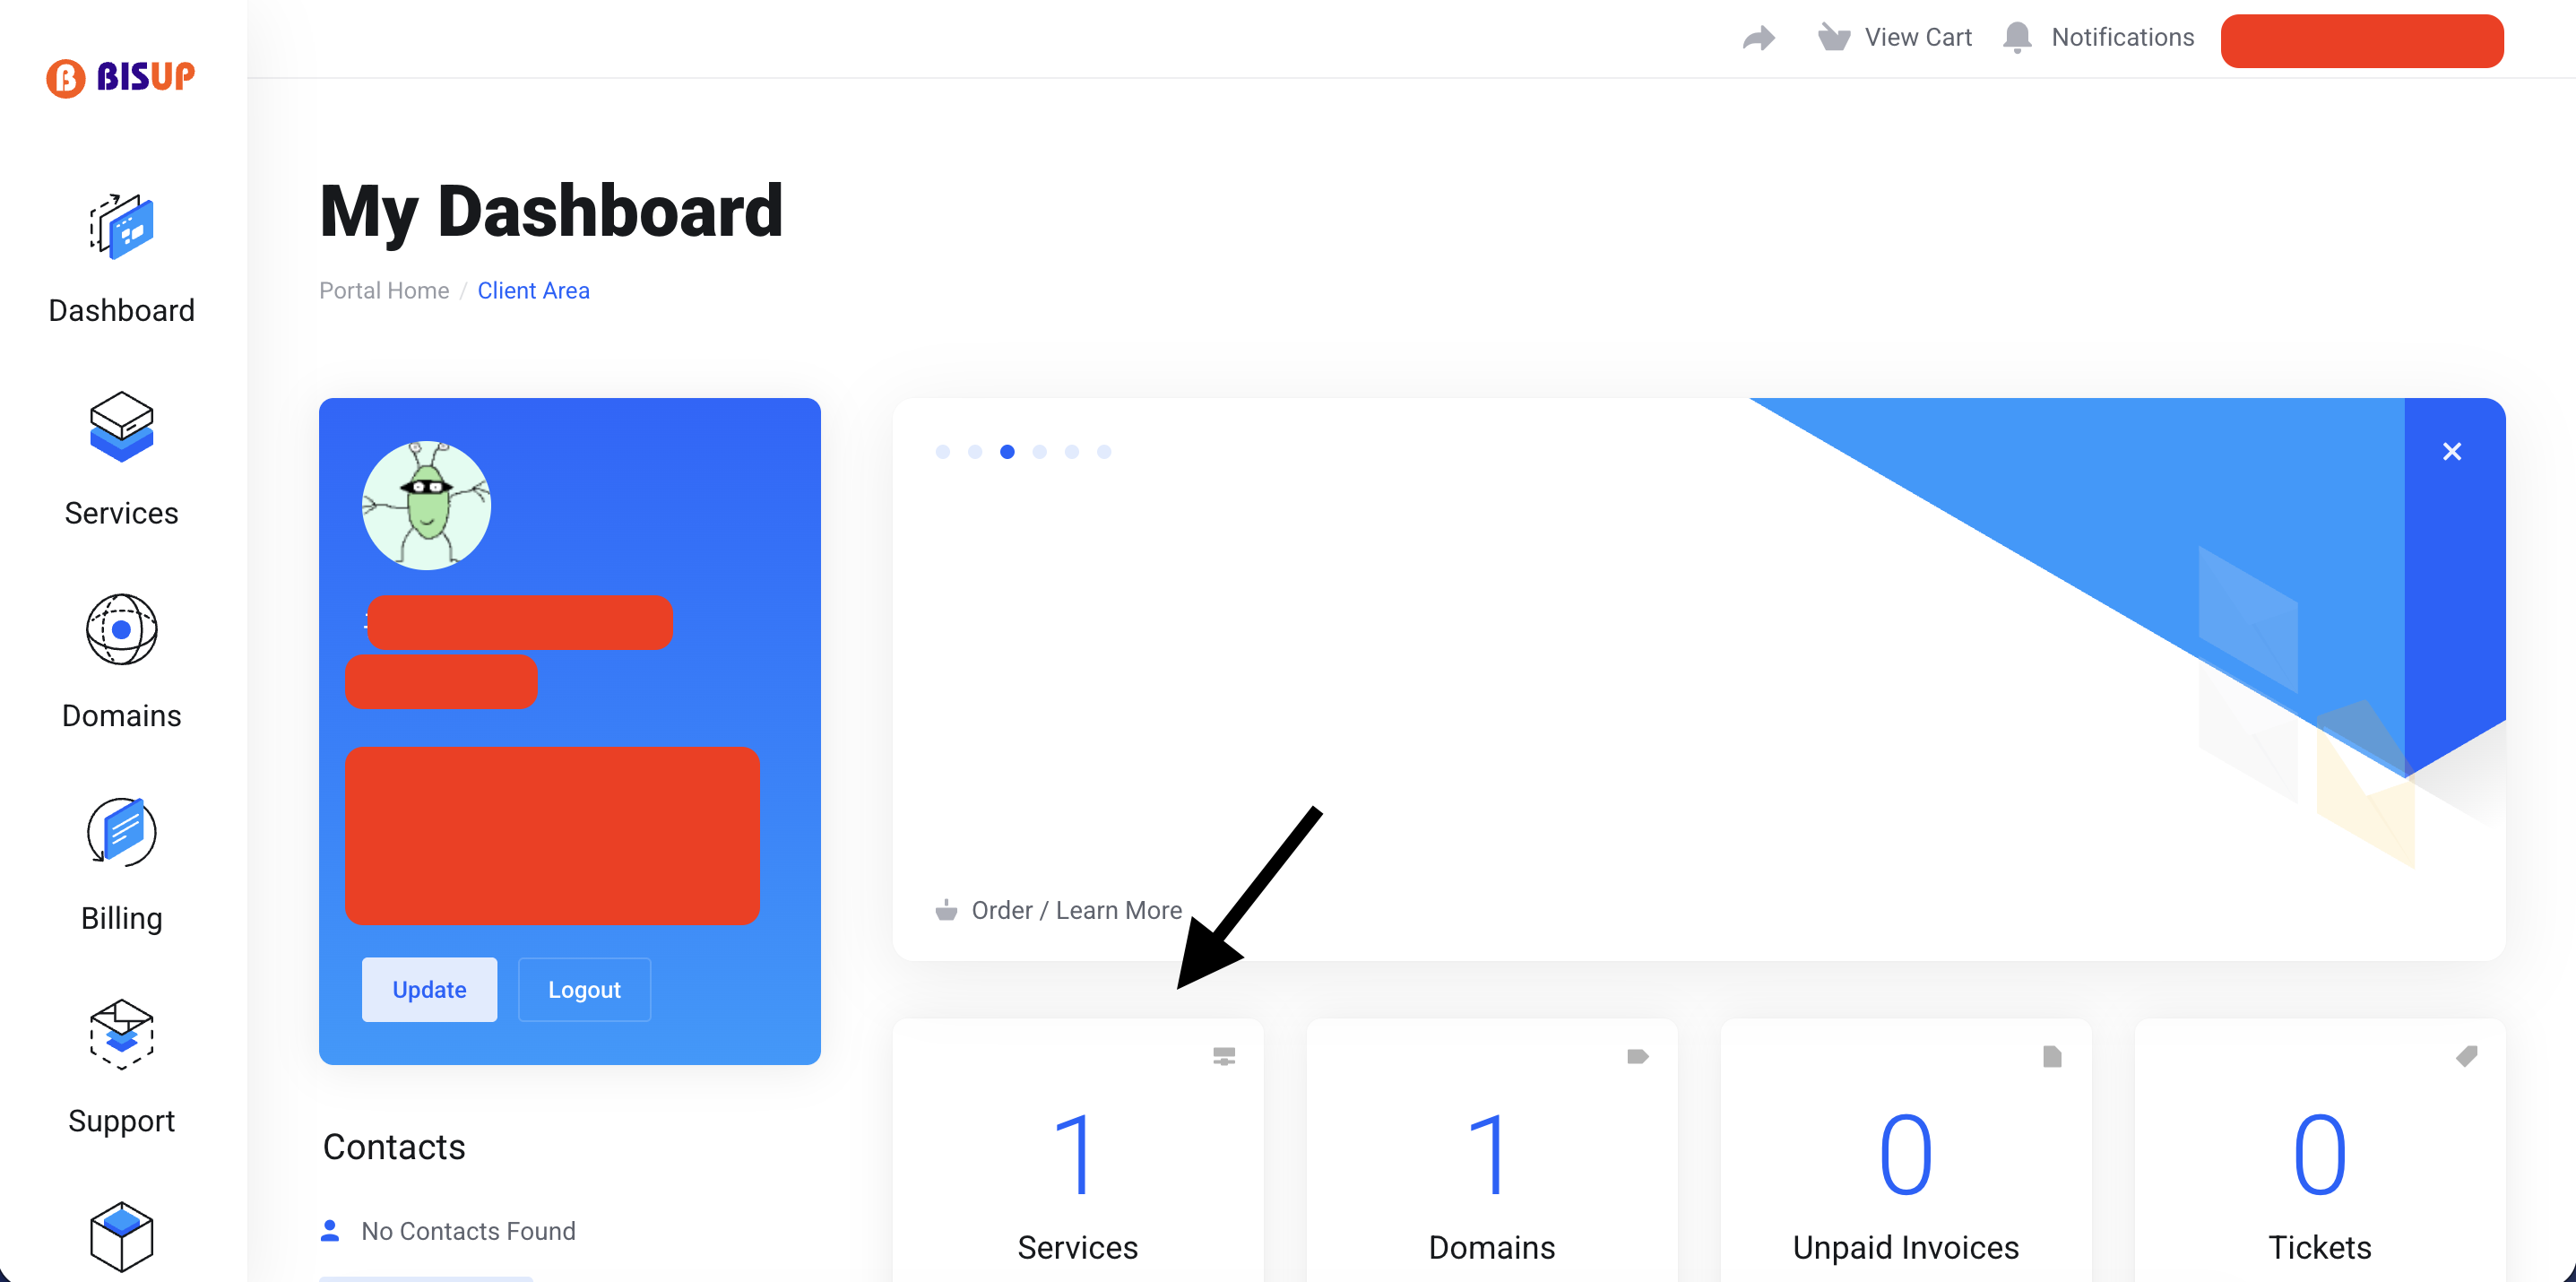
• Visit your Client Area
• Click on Services Button
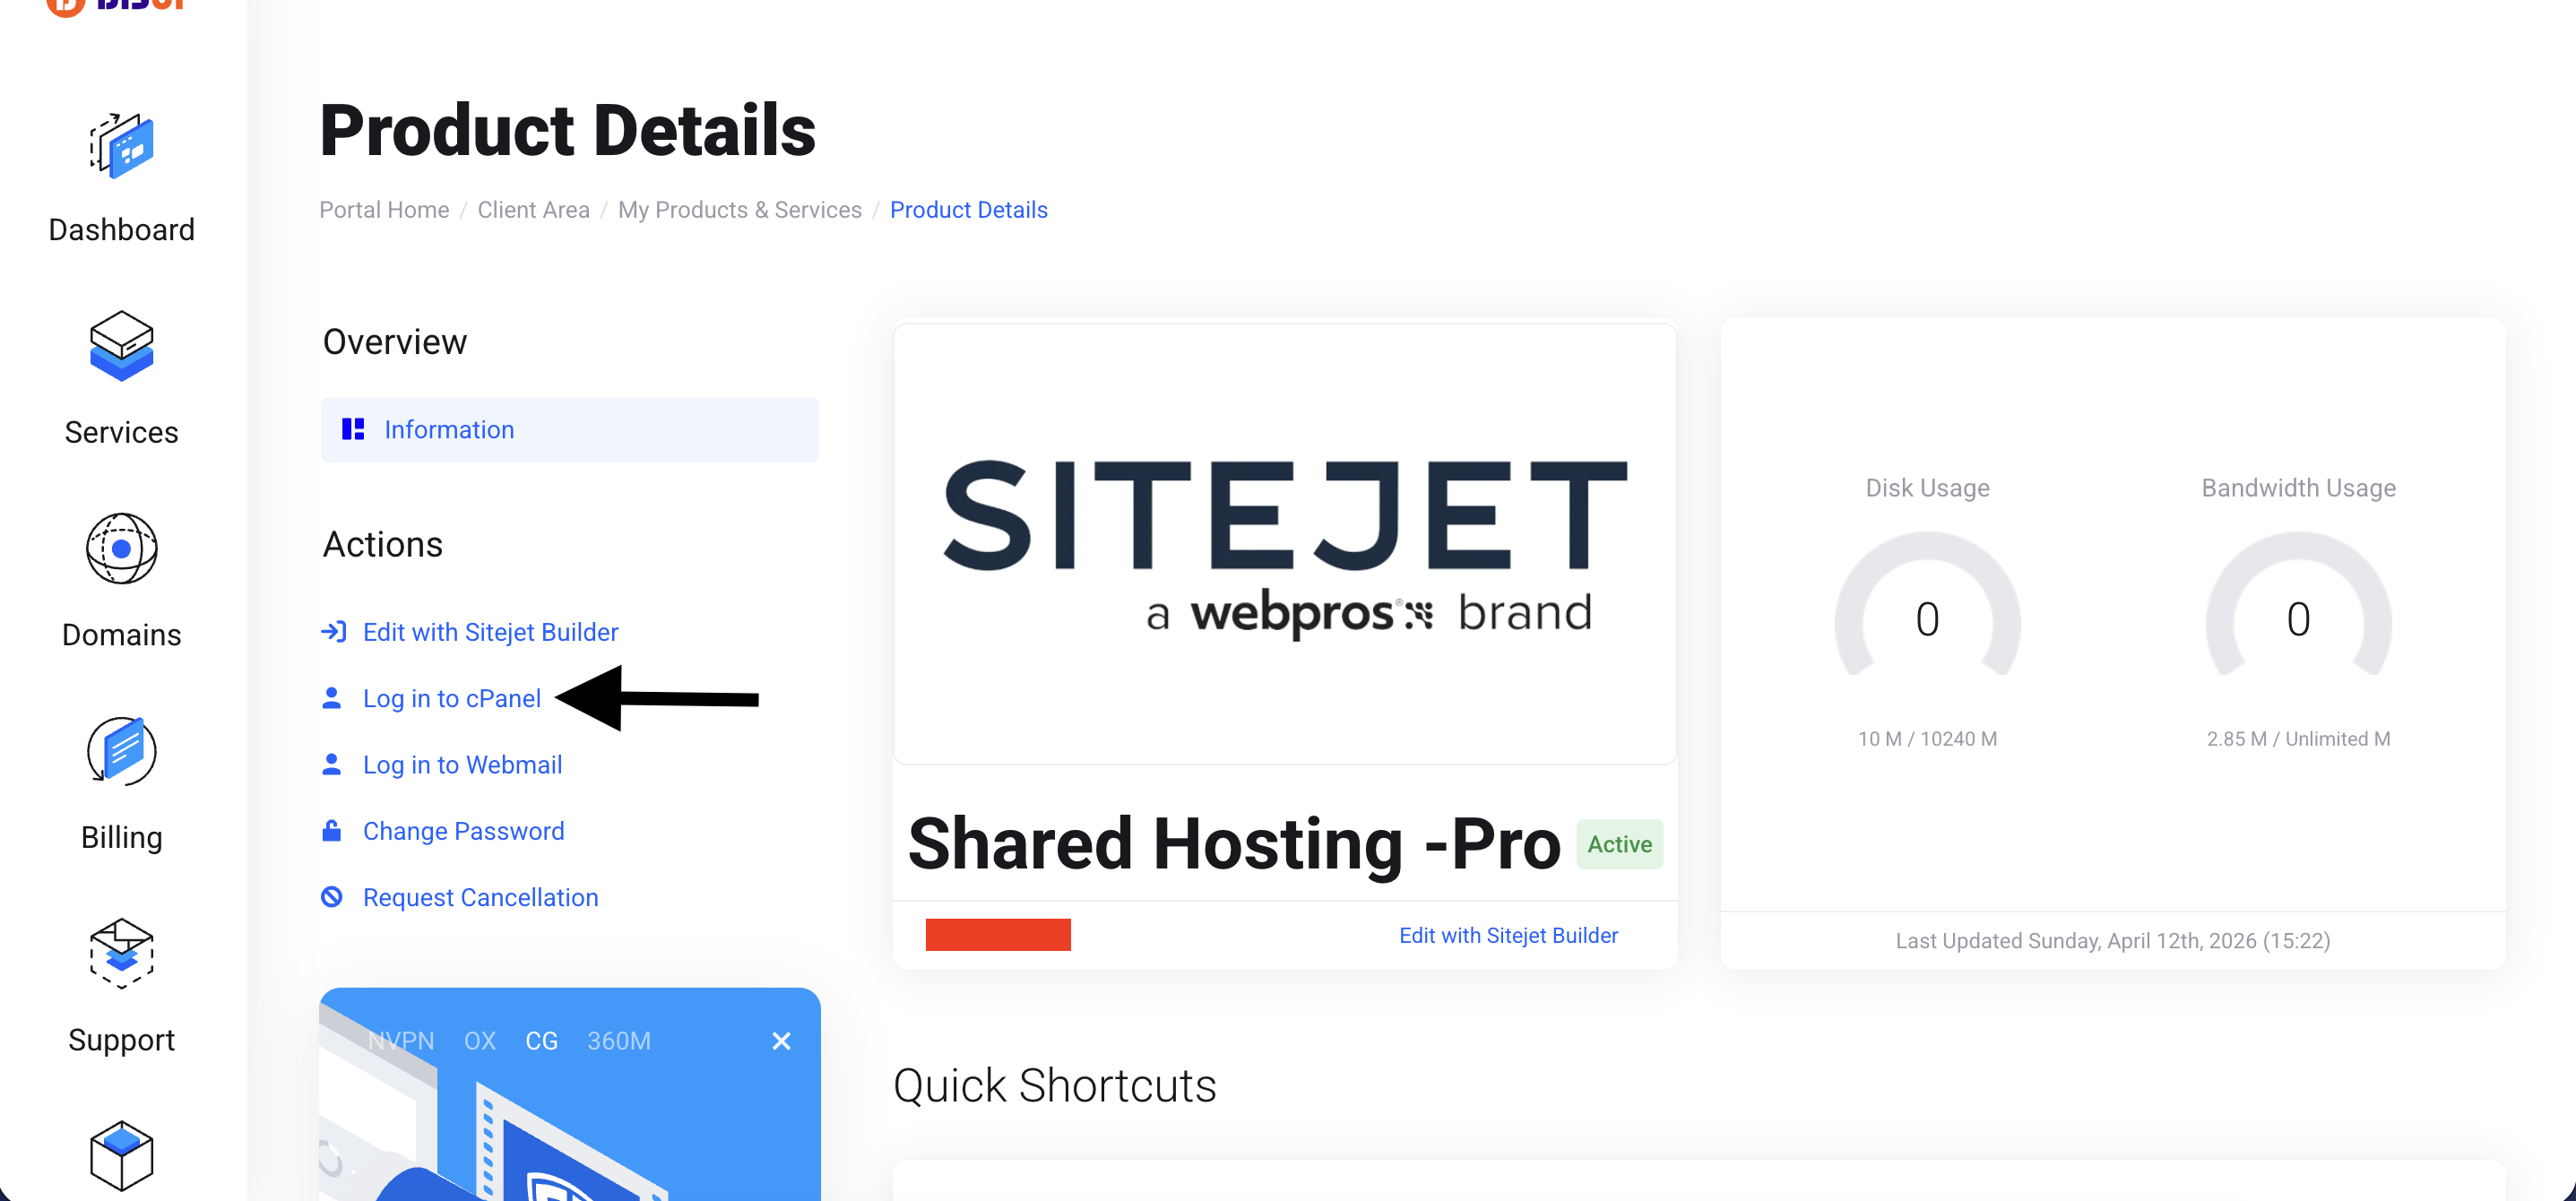
• Click on Login to cPanel
Step 2: Open Softaculous App Installer
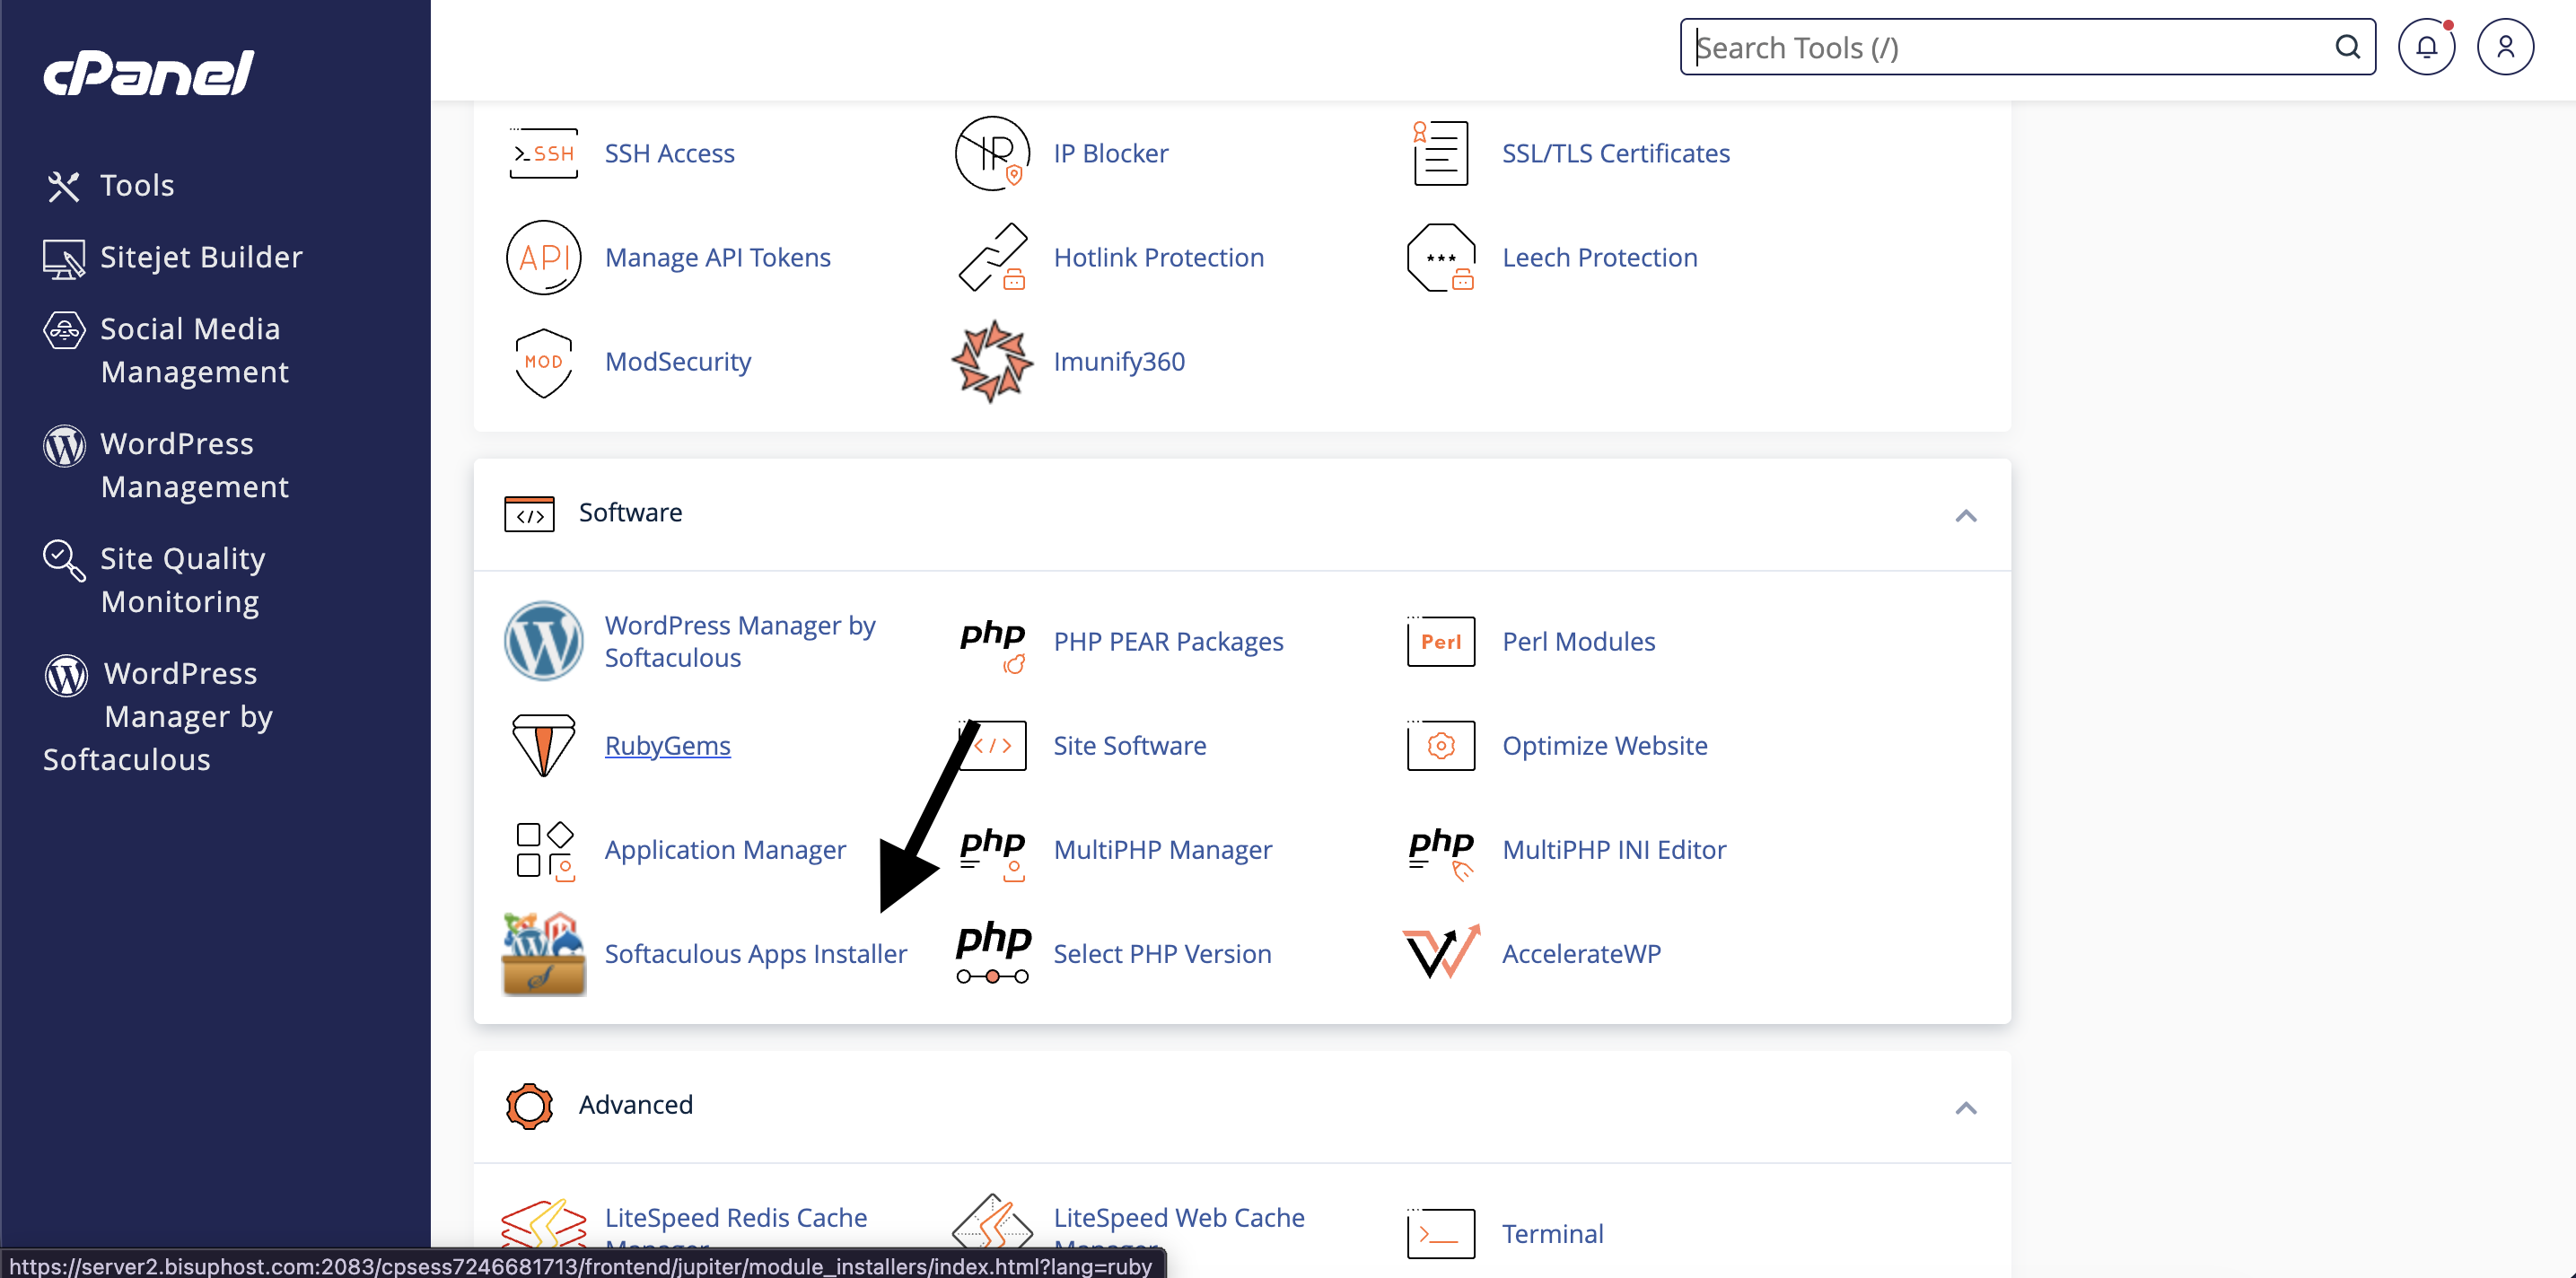
• Scroll down to the "Software" section.
• Click on the "Softaculous Apps Installer" option.
Step 3: Select WordPress
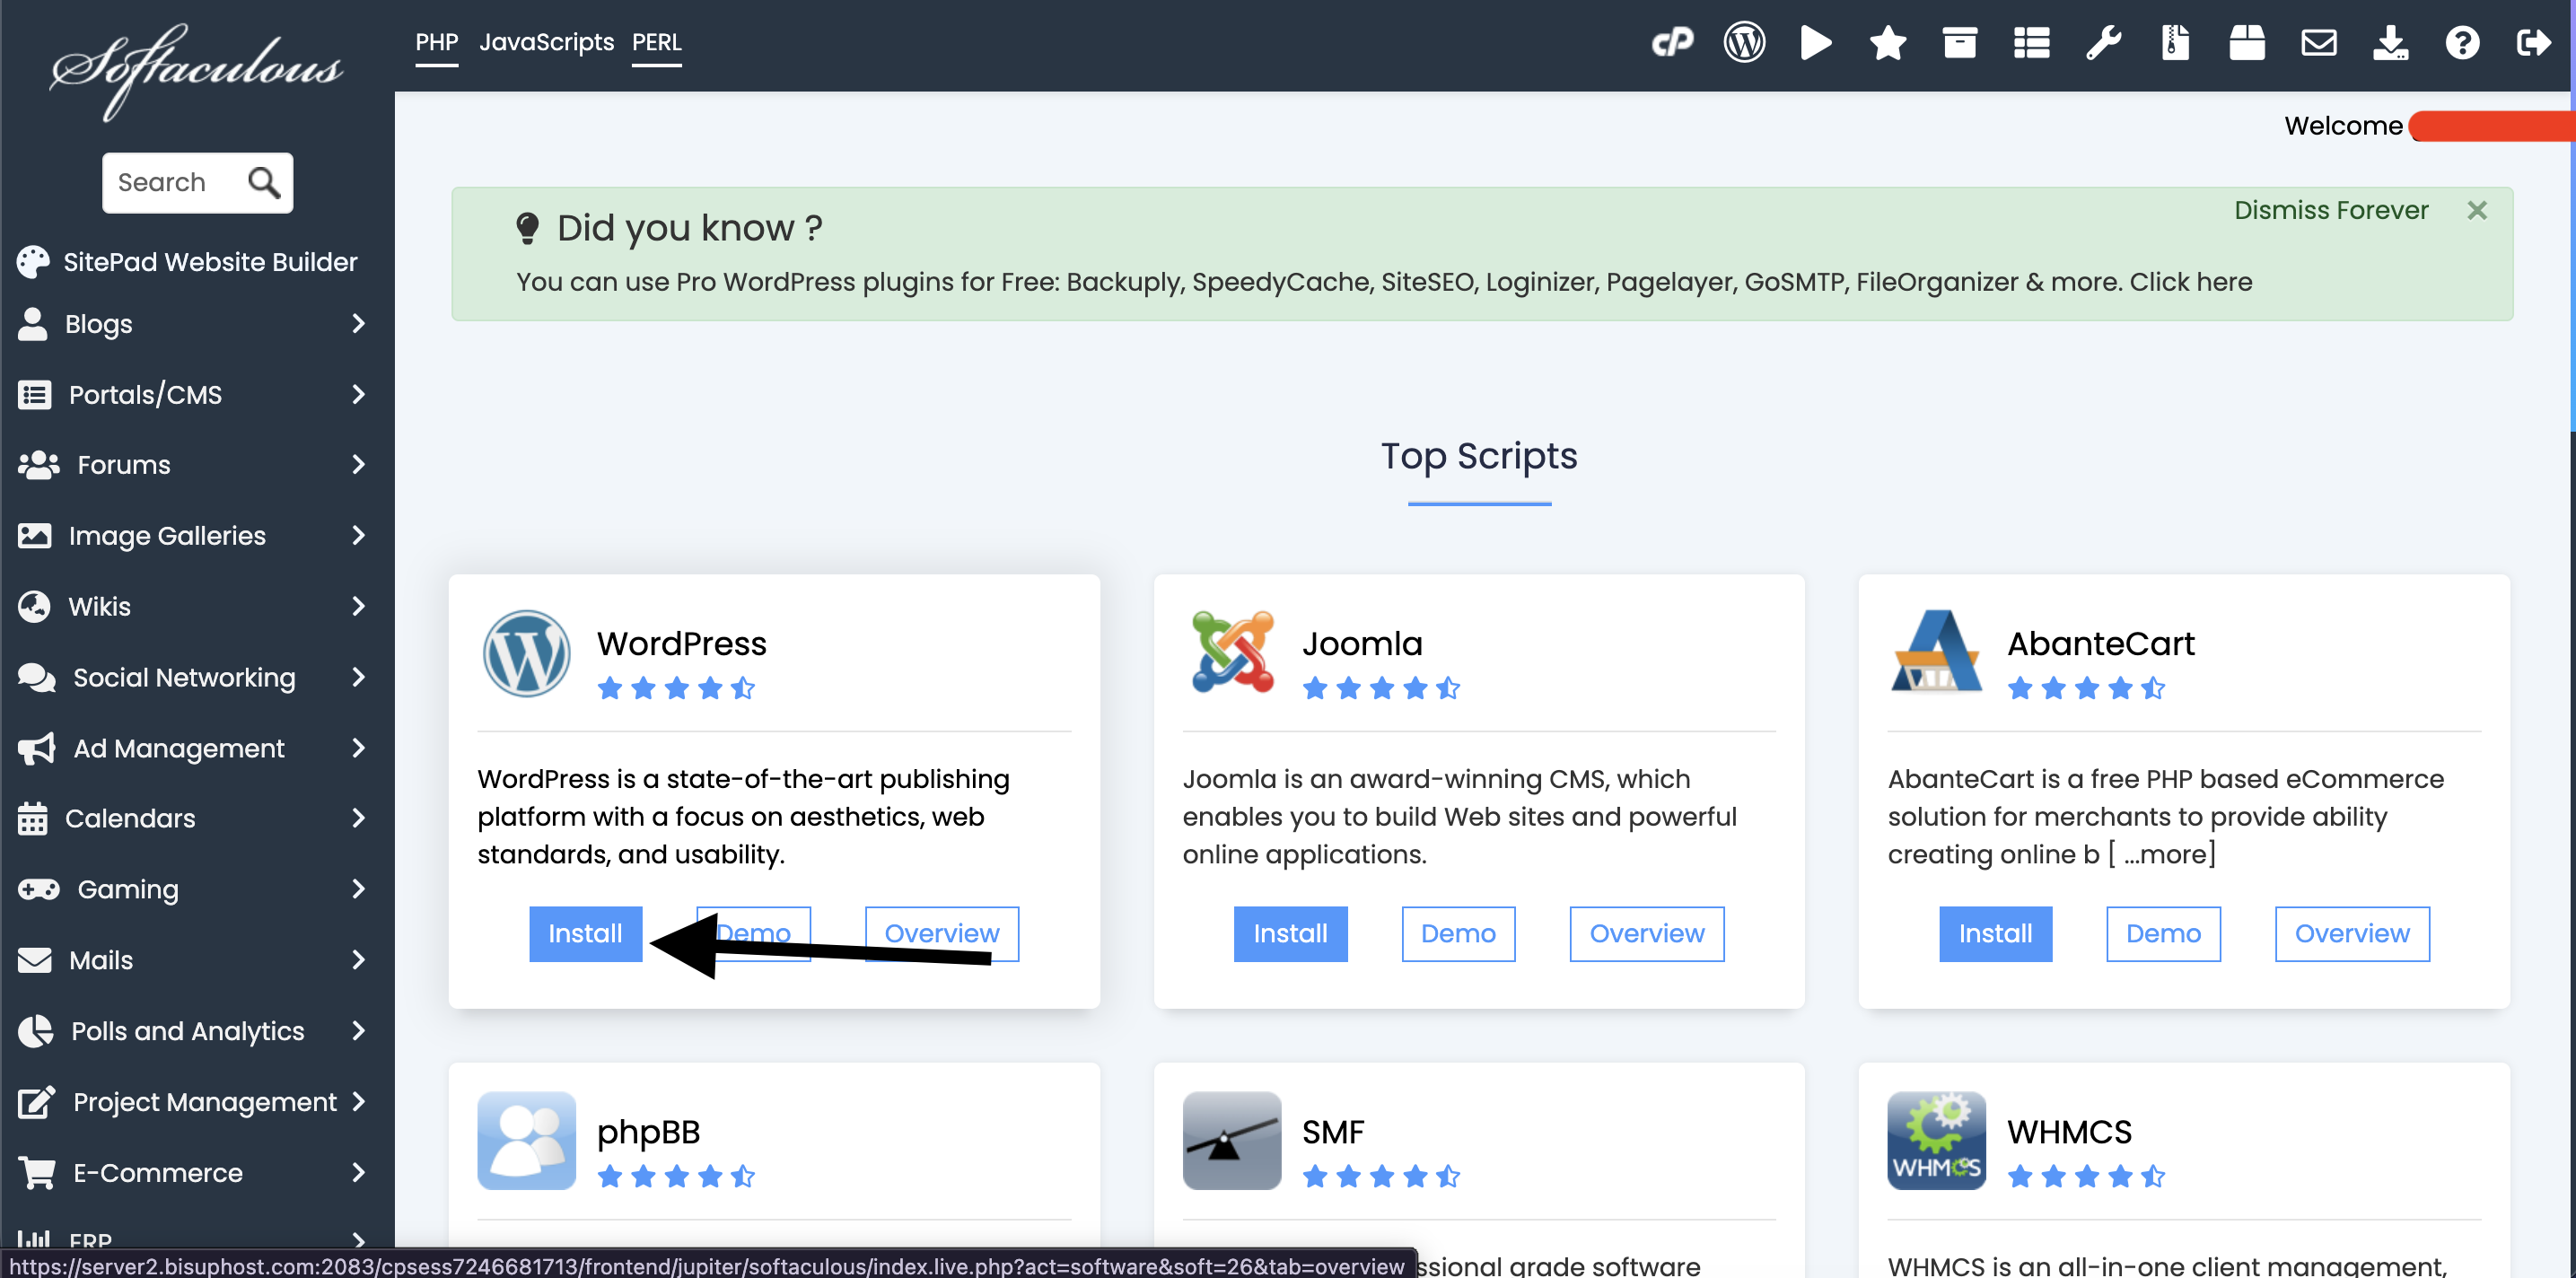
• Search for WordPress in Softaculous.
• Tap on it.
• Tap on "Install Now."
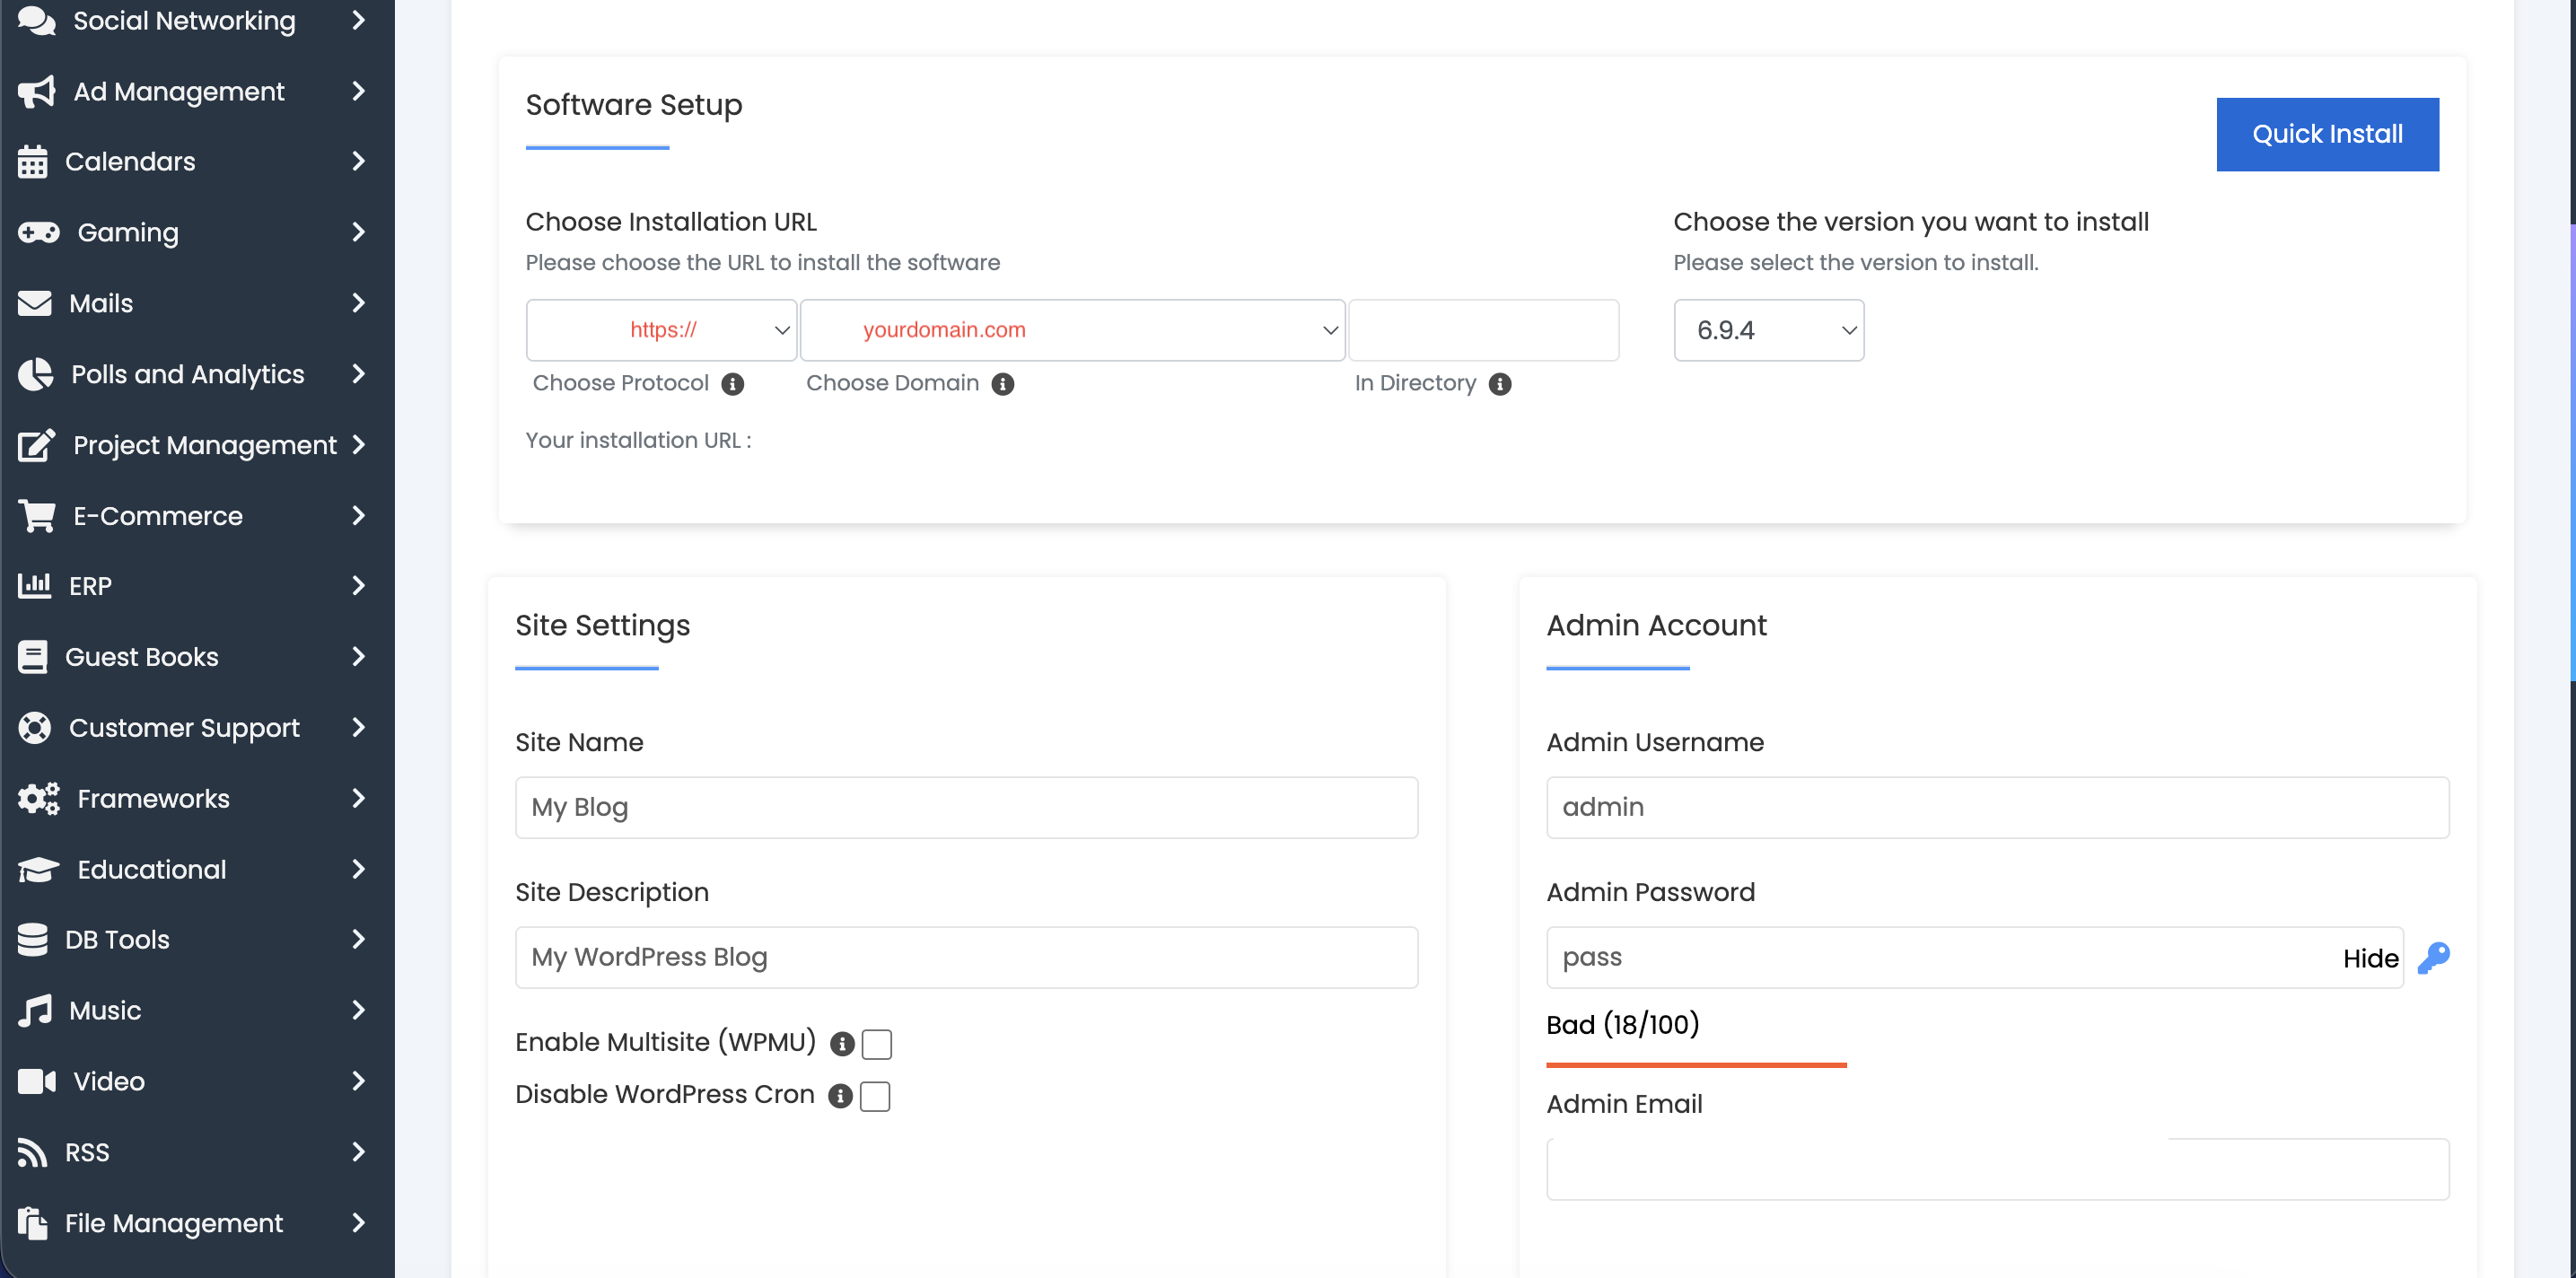
Step 4: Set Up Installation Settings
Then you have to fill in details below:
Choose Installation URL
•Pick your domain name. Example: yourdomain.com
•Leave "In Directory" blank
Site Settings
•Site Name (For example, My Website)
•Site Description (not mandatory)
Admin Account
•Admin Username
•Password
•Admin Email
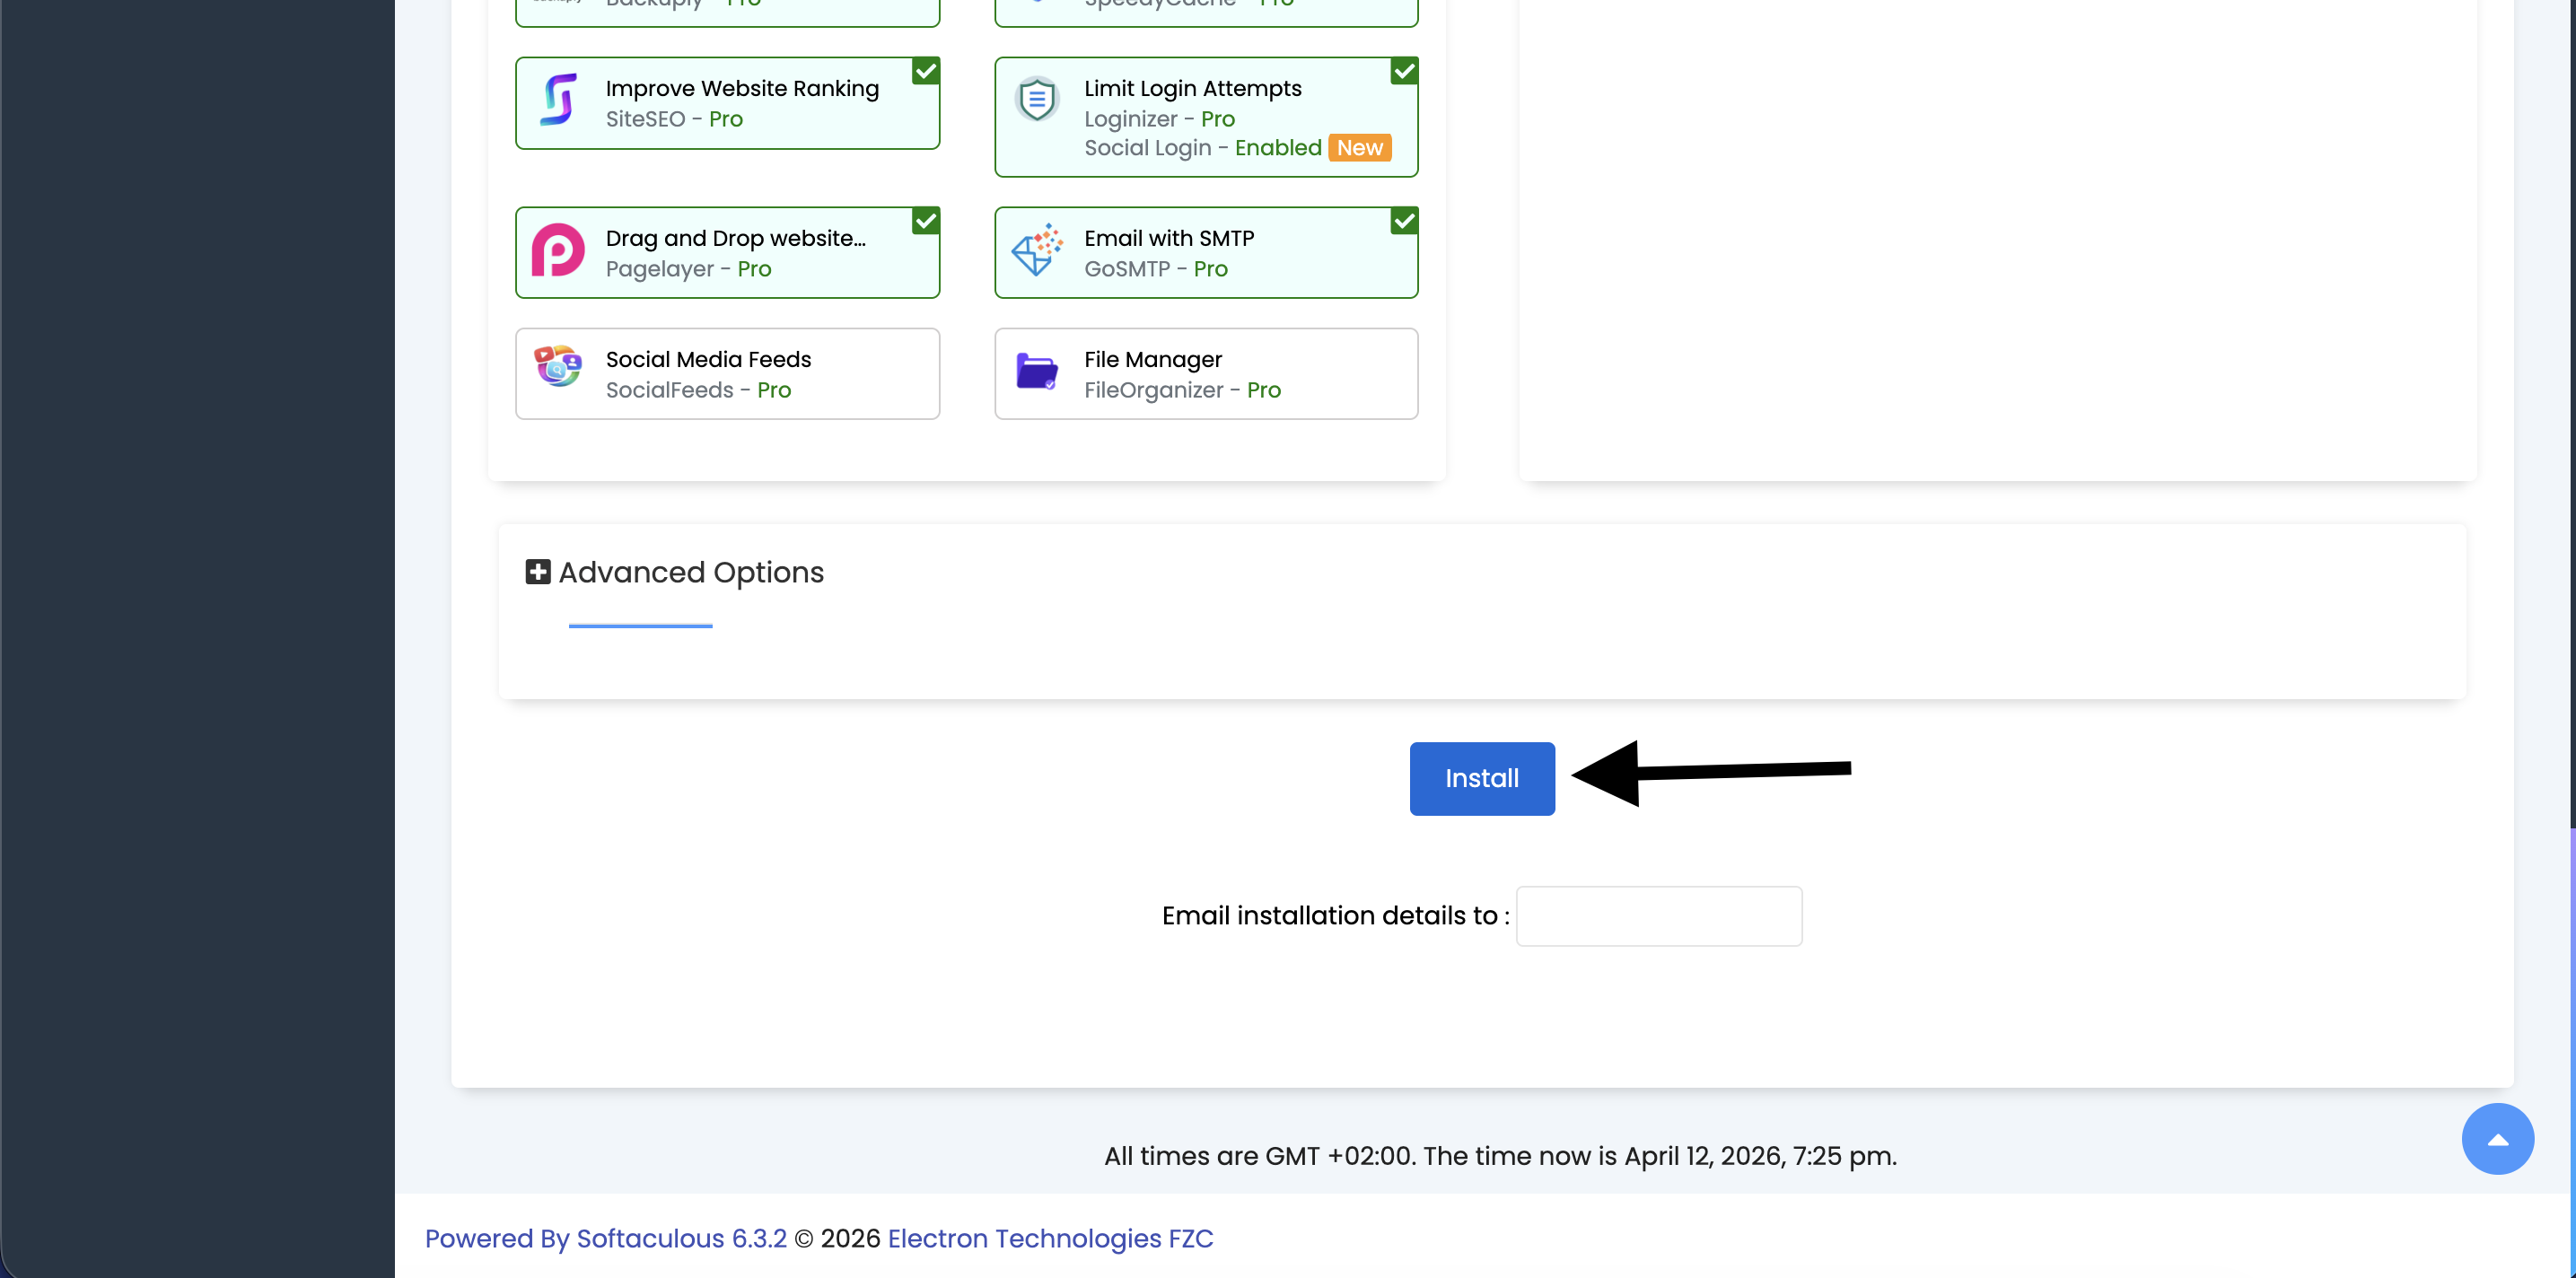
Step 5: Language & Plugins (Optional)
•Set your preferred language.
•Advanced options on plugin setup can now be skipped.
Step 6: Click on Install
•Click on "Install" button.
•Wait for 1–2 minutes.
Step 7: Visit Your Website
Once the installation is done, you will be able to view your website URL at
•https://yourdomain.com
•Admin panel: https://yourdomain.com/wp-admin
Use your admin username and password to log in
Takeaways
•Always use a strong password.
•Update WordPress.
•Set up a security plugin right after installation.
•Regular backups
Need Help?
If you have any trouble with this, feel free to contact Bisup Support and we'll be happy to help you!


